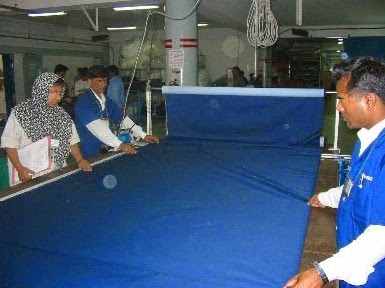
Shade Marking and Inspection in Fabric Spreading
If one were to take several batches of cloth (which were of the same shade) and subject them to close scrutiny, it would become apparent that each batch of cloth differed slightly in shade from its neighbor. If a bodice was cut from one batch, and the sleeves from another, this difference in shade would show in the finished garment. In order to prevent shades being mixed several steps are taken in the Cutting Room. In this article we explain details on shade marking and inspection in fabric spreading process in the garments industry.

Whenever two different batches of the same color are spread on one lay and they are separated:
- By spreading a batch of another color between the two light colors, so that there is clear distinction between the two.
- By laying a sheet of marker paper on the top of the first batch and spreading the second batch immediately on top of it. In this case the two shades are separated by paper.
Some manufacturers go to extreme lengths to prevent shading, they argue that one end of the batch may differ from the other and this is perfectly true. Such manufacturers identify every single layer of cloth by using stick-on labels with the following information printed:
Cut Number- Spread Number- Ply Number-
The ply is sometimes identified as a letter of the alphabet instead of a number. The labels are stuck onto the wrong side of the cloth parts at the bundling stage and removed when no longer required (when the garment is stitched together). Machines for printing the labels are, TICKOPRESS and SOABAR. Models of pin, sew or thermoply types. Of these three thermoply is the most useful for the dress trade. Pin or staple models may damage the dress fabrics.
After shades have been separated into bundles they are grouped together by shade and fed to the machines, with the objective of minimizing the frequency of thread color change, which would be necessary if bundles which came in sequence were of different colors.
Lay Inspection:
The spread can be re-inspected by the Quality Control Department after it has been completed prior to placing the marker paper onto the top most lay of the spread.
| SL | Check points | Allowance |
| 1 | Ensure the correct fabric has been laid as per the production order. | No allowance |
| 2 | Ensure the fabric has been laid in the correct manner, i.e. one way, face up, face down, face to face, step spreading etc. | No allowance |
| 3 | Ensure the correct marker has been placed onto the top most lay of the fabric. | No allowance |
| 4 | Ensure the marker is laying close and flat to the lay. | No allowance |
| 5 | In solid color fabric, in the same width, ensure that roll edges of the lays are even and no in or out, i.e. no curling. | Plus-minus Quarter inch |
| 6 | Ensure the fabric is laid to the same length of the marker. | Zero to one inch |
| 7 | Ensure the fabric is to the correct width to the marker. | Zero to half inch |
| 8 | Ensure the lay has the correct number of plies per color, except the last layers of the color in a cut-all order. | Plus-minus one ply |
| 9 | If the fabric lay is of one color of different batches, ensure the paper separator has been used between the two batches. | No allowance |
| 10 | If the fabric lay is of one color of one batch having slight variation in shade in different fabric rolls, ensure the stick-on labels have been used to identify every single layer. | No allowance |
The above 100% inspection from 1 to 10 must be completed prior to cutting. If any error is found, the cutting supervisor must be informed and cutting must not start until the error is rectified.
Finally, we understand that Shade Marking and Inspection in Fabric Spreading is a very important and indispensable part in the garmnets industry. A garment must have same shade in the every part sewing together. Otherwise part shading makes a full garment rejection in the final stage.
- You may love to read: Fabric Spreading Process in Garments Industry
- Major Problems in Fabric Spreading
